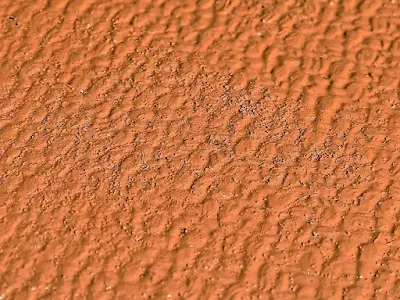
In the later part of the last millennium, the HideAway crew armed with the philosophy that a project once done is always done, painted her nonskid deck areas. (Quit laughing, Brightsides is expensive marine grade paint!) As expensive as it was there were problems concerning my intended purpose:
Brightsides is Not Made for Nonskid Deck
 |
| LARGE SHARP Granules |
 |
| Not for Boat Decks! |
Who would have thought that marine grade nonskid nodules existed? Perhaps they didn’t at the time. At least that would make the capt less guilty after he used common garage floor nonskid granules which mixed with the expensive paint had the feel and cutting ability of 40 grit sand paper.
Over the ensuing decade and a half none of the crew
complained, at least to the hard of hearing capt, nor did anyone slip off the
boat. When “paint the nonskid” came up
on the refit list so did the request from the crew that some other nonskid
material must be found.
Marine Grade Nonskid Nodules Do Exist!
Marine Grade Dollars
Research revealed a product that met all the criteria; it was marine grade, expensive and available at the local marine store. If I only had marine grade dollars life would be easy...
Intergrip made by Interlux consists of small spheres not
unlike micro balloons used with epoxy.
In both cases you do not want to use them near a fan nor would you want
to breathe in any of them. Intergrip
mixes easily with Brightside’s but you have to mix the lumps out and stir
occasionally when painting. The product
can be sprinkled on wet paint but I prefer to mix.
 |
| INTERGRIP NODULES ON DECK |
I used recycled 6oz yogurt cups to mix 1 part Intergrip to 8 parts paint. After waiting 15 minutes to let the paint cover the nodules as prescribed in the instructions, I found the concoction made just enough for one comfortable painting session. (This yogurt cup is narrow at the base and wide at the top- the reverse would will set your mind at ease)
I’ve not had the chance to test the result under sail of course but the grip with bare feet or sandals with a bit of the morning dew is encouraging and it does not draw blood when knelt upon.
Make Your Own Custom Boating Rustic Wood DoorMat by SailingHideAway
View more Rustic wood Door Mats at zazzle.com
Interlux Brightsides One Part Marine Grade Polyurethane
I’ve used Interlux Brightsides successfully on the initial
nonskid project where smoothness was not required and on the dinghy where it
was. Yes, it’s very expensive but it
works very well. After 15 years of hard
use our dinghy still looks great. Besides, the existing nonskid paint did not
fail-It just wore off in high use areas.
The Application
 |
| TAPING OFF THE NONSKID PRIOR TO PAINTING |
Taping is almost as important as the paint because if you make a mistake while taping it likely will last as long as the paint. Masking tape has some flex to it so it can be tortured into place. Do not hesitate to add another layer to cover an error. Its easier and faster than re taping.
 |
| FREE-HAND CORNER DETAIL |
I taped the straighter lines and experimented with corners and arcs using a razor sharp knife and lots of tape. Either one seemed to work, but the latter favors steady hands.
 |
| FINISHED NONSKID |
I found that pouring paint directly on the area less wasteful than using a tray. Remember though, HideAway is on a sturdy trailer rather than in the wet slip. {Darn}


No comments:
Post a Comment